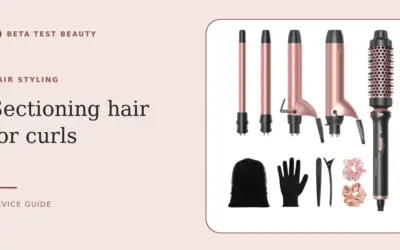

Learning how to make hair curly with curling iron starts with control, not maximum heat. Hair texture, length, dryness, barrel diameter, section size, and cooling time shape results more than premium branding alone.
This guide covers a repeatable routine for loose waves, defined curls, and longer-lasting hold. It also explains when a curling iron is the wrong tool, how to reduce heat exposure, and which design details matter when comparing devices during November 2026.
For broader temperature guidance, consult this guide to reading hair styling tool temperature claims. Product data is unavailable for this comparison, so recommendations below focus on technique and buying criteria rather than named devices.
Buying Guide for how to make hair curly with curling iron
Barrel diameter and curl shape
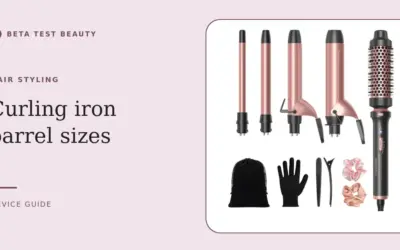
Barrel diameter changes the finished shape first. A smaller barrel creates tighter curls, while a larger barrel produces softer bends that may relax faster in long or heavy hair.
Match barrel size to your goal and hair length. Very large barrels can struggle to wrap short layers, while very small barrels can create more definition than desired on thick or naturally curly hair.
Adjustable temperature
Adjustable heat matters because hair does not require one universal setting. Fine, lightened, dry, or fragile hair generally needs a lower starting temperature than coarse, dense, or resistant hair.
Begin with the lowest setting that shapes one small section, then increase gradually only if the curl will not form. Avoid repeated passes, because total heat exposure rises each time hair returns to the barrel.
Temperature displays help with consistency, but a displayed number does not prove even barrel heat or suitability for every hair type. Read manufacturer guidance and stop if hair feels unusually dry, hot, or brittle.
Hair preparation and complete dryness
Start with clean or appropriately refreshed hair, then dry it completely before using a heated curling iron. Damp hair can heat unevenly and may suffer more stress during styling.
Apply products designed for heat styling according to their labels, and use enough hold for your hair without making sections wet. Separate detangling, heat protection, and finishing steps so each product can perform as intended.
Section size and wrapping technique
Section size controls how evenly heat reaches hair. Smaller sections usually create more consistent curls, while oversized sections can leave outer strands shaped and inner strands under-styled.
Brush or comb each section before wrapping, then keep tension controlled rather than pulling aggressively. Wrap hair away from your face for an open look, and alternate direction through the back for separation.
Do not hold hair against a hot barrel longer than needed. A short, consistent contact time is easier to repeat than holding each section until it feels excessively hot.
Clamp, wand, and rotation control
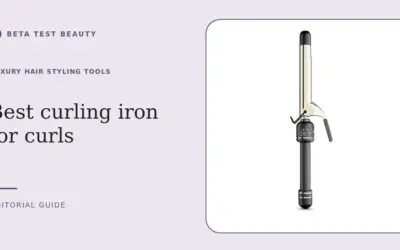
A clamped iron offers more control at the ends and can suit users who prefer a defined curl routine. A wand removes clamp marks but demands careful hand positioning and greater attention near skin.
If using a clamp, avoid squeezing too tightly or sliding repeatedly over one area. If using a wand, keep the tapered end pointed away from your face and leave a safe distance from fingers, ears, and scalp.
Ergonomic details affect consistency. A swivel cord, stable stand, clear controls, and comfortable grip can reduce awkward wrist movement, but they do not replace sound heat practice.
Cooling, brushing, and hold
Fresh curls need time to cool before brushing. Hair temporarily holds the shape created by heat, but aggressive brushing while warm can turn defined curls into loose, uneven waves.
Let each curl rest in its shape, or pin it gently while cooling if your routine supports that method. Once cool, separate with fingers before using a brush, then add finishing product sparingly.
Humidity, hair weight, product buildup, and natural texture all affect longevity. A weaker result does not automatically mean the curling iron failed; preparation or section size may be the real variable.
Maintenance, storage, and ownership
Residue from sprays and oils can collect on a barrel and interfere with smooth wrapping. Unplug the device, let it cool fully, and follow its care instructions before cleaning the surface.
Store the iron where its hot barrel cannot contact fabric, cords, children, or pets. Check the cord, plug, controls, and housing periodically, and stop using the device if damage appears.
Warranty length, replacement availability, voltage compatibility, and auto shutoff can matter more than decorative finishes. Compare those ownership details before paying more for styling features you may not use.
For related maintenance advice, see practical fixes for tangled styling tool cords and the Luxury Hair Styling Tools category.
Why You Should Trust Us
Our evaluation framework separates documented specifications from interpretation. We assess temperature controls, supported styling uses, ergonomics, maintenance, safety information, warranty terms, and compatibility before forming a recommendation.
No product data is supplied for this comparison, so no named device receives a performance verdict. That limitation matters: technique guidance can remain useful, but product-specific claims require manuals, manufacturer documentation, and clearly attributable evidence.
Final Thoughts
There is no defensible best overall, best value, or best specific-use product recommendation here because the listed product list contains no products. Choosing responsibly means matching barrel size, heat adjustment, handling, and warranty support to your hair and routine.
Prioritize adjustable temperature and comfortable control if you style often. Choose a smaller barrel for tighter definition, a larger barrel for relaxed movement, and a clamped design when end control matters more than wand flexibility.
Skip a purchase when the device lacks clear operating guidance, feels unsafe to handle, cannot match your voltage, or offers no credible support information. A premium finish alone does not justify a higher ownership cost.
FAQs
How to make hair curly with curling iron without damaging it?
Use fully dry hair, apply suitable heat protection, start at a conservative temperature, limit contact time, and avoid repeated passes. Stop if hair feels unusually hot, brittle, or dry.
Should hair be wet or dry before using a curling iron?
Hair should be fully dry before using a standard curling iron. Damp sections can heat unevenly and increase styling stress.
What barrel size creates loose curls?
A larger barrel generally creates a looser bend, although hair length, density, texture, and cooling time also affect the result.
Why do my curls fall out quickly?
Large sections, excess product, heavy hair, humidity, insufficient cooling, or an unsuitable barrel can reduce hold. Change one variable at a time.
Should I curl every section in the same direction?
Curling away from your face creates a consistent open frame. Alternating directions through the back can create more separation and reduce a uniform, brushed-out appearance.
Is a curling wand easier than a curling iron?
A wand can avoid clamp marks, but it requires more careful hand placement. A clamped iron may offer better end control and a more repeatable routine.
How long should curls cool before brushing?
Let curls cool completely before brushing or separating aggressively. Cooling time varies with section size, hair density, and ambient conditions.
When should I replace a curling iron?
Replace it when the cord, plug, housing, controls, or barrel shows damage, or when temperature behavior becomes inconsistent. Seek professional advice if a heat injury occurs.
For additional heated-tool care, review why a heated brush may not reach its selected temperature.
Evidence and safety references
These references support the general technology and safety context. Product specifications can change; confirm the current manual and regulatory status before use.
- Study: hair-shaft damage, dryer temperature and distance
- Study: effects of heat treatment on hair structure
Safety note: Beauty devices are not a substitute for diagnosis or treatment. Follow the device instructions and consult a qualified clinician if you have a skin condition, take photosensitizing medication, are pregnant, or are unsure whether a device is appropriate.