
A hair blowout is a styling technique that uses a blow dryer and brush to shape damp hair as it dries. The result can be smooth, voluminous, or softly curved, depending on your tools, technique, and desired finish.
The method matters more than owning a premium dryer: careful preparation, manageable sections, and controlled airflow help make styling more consistent. For context on choosing equipment, see our premium hair dryer category guide, then use the steps below to build a routine suited to your hair.
What Is a Hair Blowout and What Do You Need?
A blowout is a way to dry and style hair simultaneously, directing airflow while brushing each section into a chosen shape. Unlike simply rough-drying, the technique involves controlling tension, direction, and when a section is fully dry.
Start with the right level of dampness
Blot hair gently with a towel or soft T-shirt after washing, rather than rubbing it vigorously. Let it air-dry briefly or use the dryer on a moderate setting until it is damp, not dripping.
Very wet hair takes longer to style and may require more heat exposure. If your hair is already partly dry, lightly dampen the areas you want to reshape instead of repeating a full wash.
Choose a brush for the finish you want
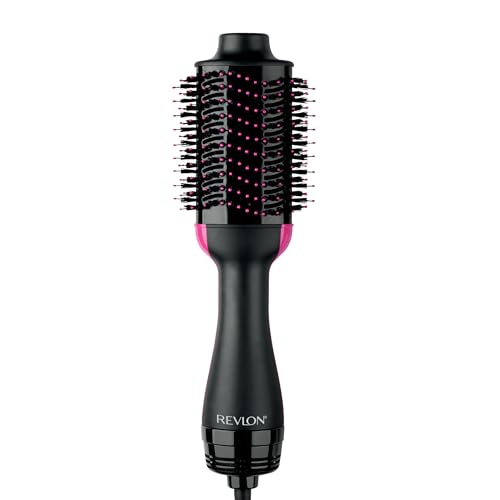
A round brush can create lift at the roots and bend through the lengths, while a paddle brush generally supports a straighter, smoother finish. Brush size affects the curve: larger barrels tend to make broader bends, while smaller ones create tighter shaping.
Hair length and texture should guide your choice as much as the desired look. Avoid forcing a brush through knots; detangle gently first, and use a manageable section that the brush can hold without pulling uncomfortably.
Use heat protection and sensible dryer settings
Apply a heat-protectant product according to its label, distributing it evenly without saturating the hair. It can help limit avoidable heat exposure, but it does not make high heat risk-free or replace careful technique.
Begin with a moderate temperature and airflow that you can control, then adjust only if needed. Keep the nozzle moving and direct air down the hair shaft; concentrated heat held close to one spot can create unnecessary stress.
Section hair before you begin
Separate hair into a few broad sections and clip away the portions you are not drying. Work from the lower layers upward so finished pieces do not become tangled with damp hair.
Each working section should be narrow enough for airflow and brush contact to reach through it. Smaller sections take longer but can be easier to control, especially around the hairline or on dense hair.
Coordinate airflow, brush tension, and direction
Hold the dryer so air travels from roots toward ends, following the brush as you guide the section. Keep the dryer moving and maintain comfortable distance; the brush should shape the hair, not tug sharply at the scalp.
For root lift, raise the section gently while drying near the base, then guide the lengths through the brush. For a straighter finish, keep the section aligned and draw the brush downward without twisting it excessively.
Finish only when the section is dry
Continue until the section feels dry throughout, rather than relying only on its surface appearance. Damp inner layers can lose their shape sooner, so check near the roots and underneath before moving on.
If your dryer has a cool setting, a brief cool-air pass can help the section settle after shaping. Finish with a small amount of suitable styling product if desired, following its directions and avoiding heavy application at the roots.
How We Assess Hair-Dryer Guidance
We focus on practical technique and on the features that affect everyday ownership, including airflow control, heat settings, attachments, maintenance, and warranty terms. Recommendations should reflect a reader’s hair, styling habits, and tolerance for time and upkeep, rather than price or prestige alone.
No individual dryer is recommended here because this guide explains a styling method, not a comparison of specific models. For a purchase decision, check the manufacturer’s instructions and warranty, and review our guide to what to check in a hair dryer warranty.
Final Thoughts
A successful blowout starts with damp, detangled hair and a plan for the finish, then relies on small sections and steady airflow. A premium dryer may make handling more comfortable through useful settings or attachments, but it cannot compensate for rushed sectioning or excessive heat.
Choose tools that suit your hair length and routine, and skip features you are unlikely to use. If noise is an important factor in your decision, our guide to comparing hair dryer noise measurements explains why measurement conditions matter.
FAQs
What is a hair blowout?
A hair blowout is a styling method that uses a dryer and brush to dry damp hair while shaping it. It can produce a smoother, fuller, or more curved finish depending on your technique.
How is a blowout different from rough-drying?
Rough-drying removes moisture without carefully shaping each section. A blowout pairs directed airflow with brushing to control the roots, lengths, and ends as they dry.
Can you do a hair blowout at home?
Yes. Work in sections, use a brush that suits your hair, and keep the dryer moving at a comfortable distance. It may take practice to coordinate brush tension and airflow.
Should hair be wet or damp for a blowout?
Hair should generally be damp rather than dripping before you start shaping it. Removing excess water first can shorten the time spent drying each section.
Which brush is best for a blowout?
It depends on your hair length and the finish you want. Round brushes can add lift or bends, while paddle brushes are often useful for a straighter, smoother shape.
How can you help a blowout last longer?
Make sure each section is dry before finishing, and use styling products sparingly according to their labels. Humidity, scalp oil, hair texture, and daily activity can all affect how long a style holds.
Does a blowout damage hair?
Repeated or poorly controlled heat styling can contribute to dryness or damage. Use a heat protectant as directed, choose a manageable setting, keep airflow moving, and take breaks from heat styling when practical.
How do you maintain a hair dryer?
Follow the manufacturer’s cleaning instructions, including guidance for the air intake filter, and unplug the appliance before routine maintenance. If airflow weakens, consult our hair dryer airflow troubleshooting guide before using it again.
What is a hair blowout in 2026, and do you need a premium dryer?
A blowout remains a brush-and-dryer styling technique, not a specific device category. A premium dryer may suit frequent stylers who value particular controls or attachments, but careful technique matters more than a luxury label.
Evidence and safety references
These references support the general technology and safety context. Product specifications can change; confirm the current manual and regulatory status before use.
- Study: hair-shaft damage, dryer temperature and distance
- Study: effects of heat treatment on hair structure
Safety note: Beauty devices are not a substitute for diagnosis or treatment. Follow the device instructions and consult a qualified clinician if you have a skin condition, take photosensitizing medication, are pregnant, or are unsure whether a device is appropriate.